← All resources
for your Divi website →
✦ CLIENT RESOURCE

HOW TO EDIT
YOUR WEBSITE.

A short guide to the everyday changes: updating wording, swapping an image, adjusting how text looks. It covers editing what's already on the page, not building new sections.

Words
UPDATE ANY TEXT
Photos
SWAP ANY IMAGE
Style
FONT, SIZE, COLOR
▶
VIDEO GUIDE
Coming soon. Until then, the steps below walk you through it.
HAVE THESE READY
before you start
 Your website login (username or email, and password)
 The page you want to change
 Your new wording or photos, ready to go
You only need the Pages menu. On any retainer plan, everything else in the backend is handled for you, so you can ignore the rest of the dashboard.
01
✦ STEP 01

Log in

1

In your browser, go to yoursite.com/wp-admin (your web address followed by /wp-admin).

2

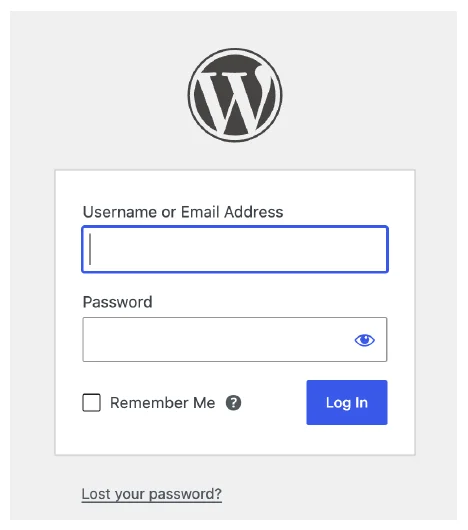
Enter your username or email and your password, then click Log In.

Browser address bar showing yoursite.com/wp-admin
WordPress login screen
02
✦ STEP 02

Open the page

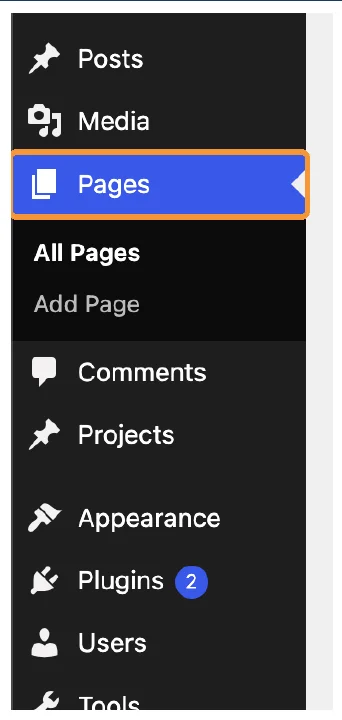
WordPress sidebar with Pages highlighted
1

Click Pages in the left sidebar.

2

Find the page you want to change and click Edit With Divi. Click View first if you want to look at it.
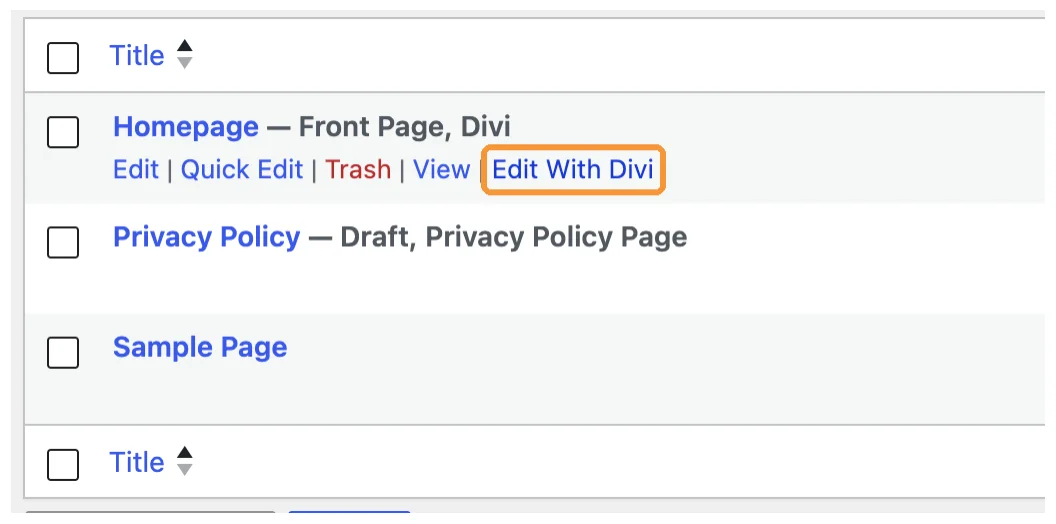
Pages list with Edit With Divi highlighted
03
✦ STEP 03

Know what you're clicking

When you hover over the page, colored toolbars show up. Each color is a different layer:

 
Sections
Blue. The big blocks of the page.
 
Rows + columns
Green. How each block is laid out.
 
Modules
Grey. The actual text, headings and images.

Stick to the modules. Sections, rows and columns hold the page together, so leave those alone.
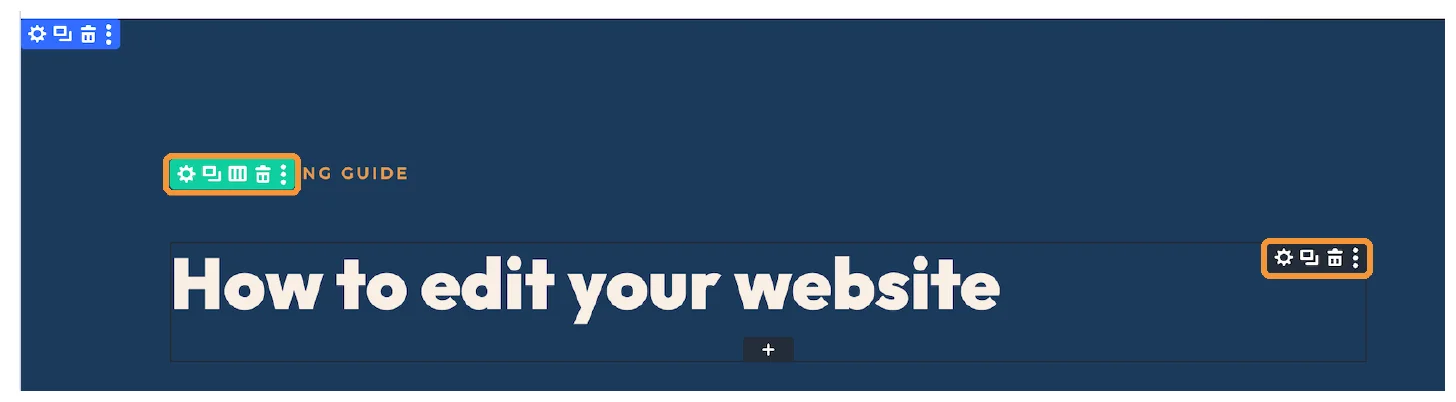
Divi builder showing section, row and module toolbars
04
✦ STEP 04

Open the settings

1

Hover over the text or image you want to change.

2

On the grey toolbar that pops up, click the gear icon.

3

A sidebar opens on the right with three tabs: Content, Design and Advanced. This guide only uses the first two.
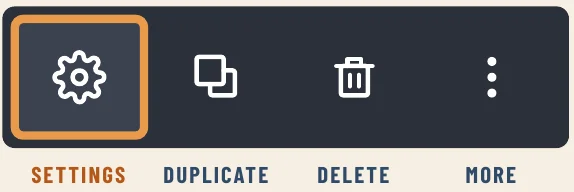
click the gear ↘
Divi module toolbar with the settings gear highlighted
05
✦ STEP 05

Change the words

Content tab

Content is where you edit exactly what it says, without touching how it looks.
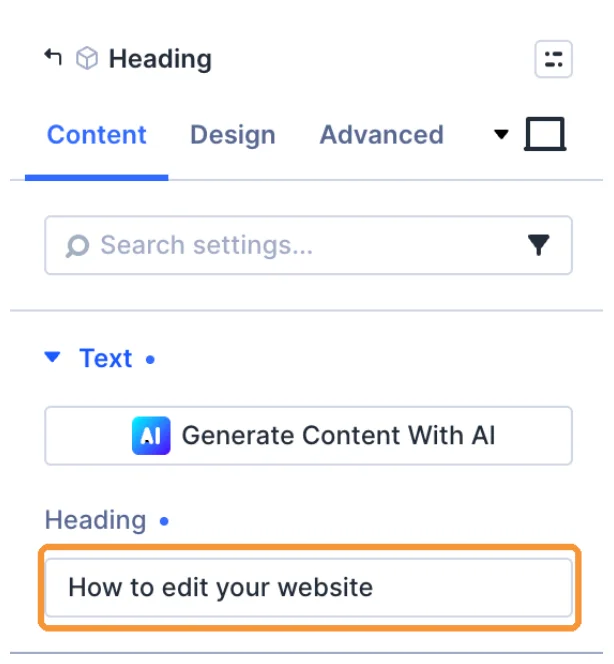
Heading module Content tab with the heading text box highlighted

Headings have a single box. Type the new heading and it updates on the page.
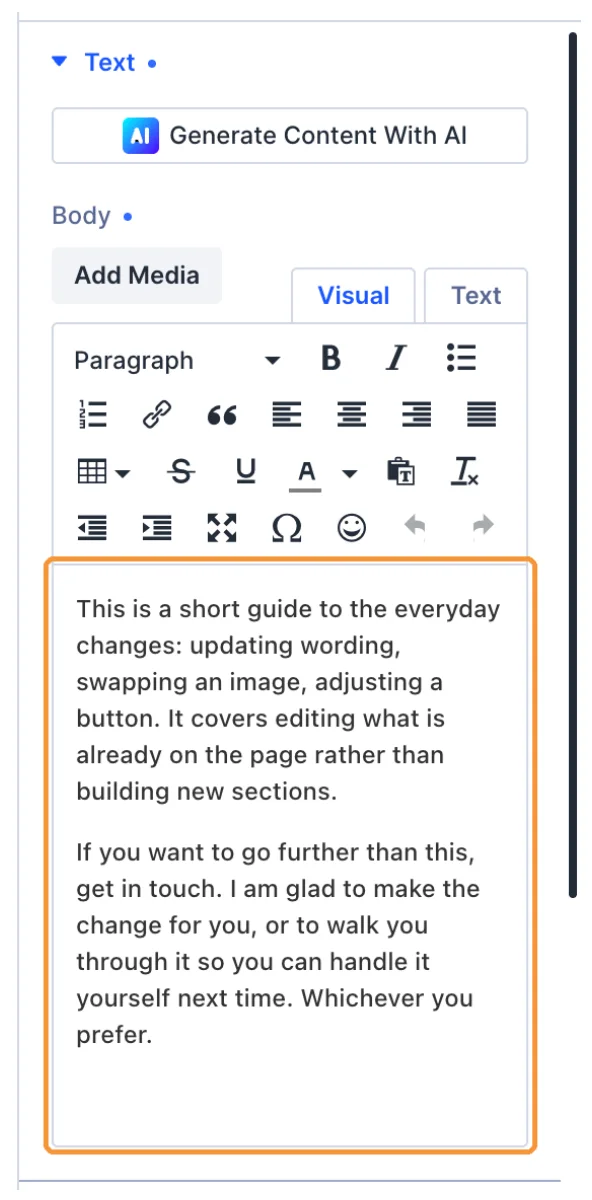
Text module Content tab with the body editor highlighted

Text modules have an editor that works like a word processor: bold, italics, lists and links.

Keep it close in length. The layout is built around the current wording, so a much longer replacement can push things around, especially on phones.
Made a mistake? Press Ctrl + Z on Windows or Cmd + Z on a Mac to undo your last change. Works anywhere in the builder.
06
✦ STEP 06

Adjust the look

Design tab

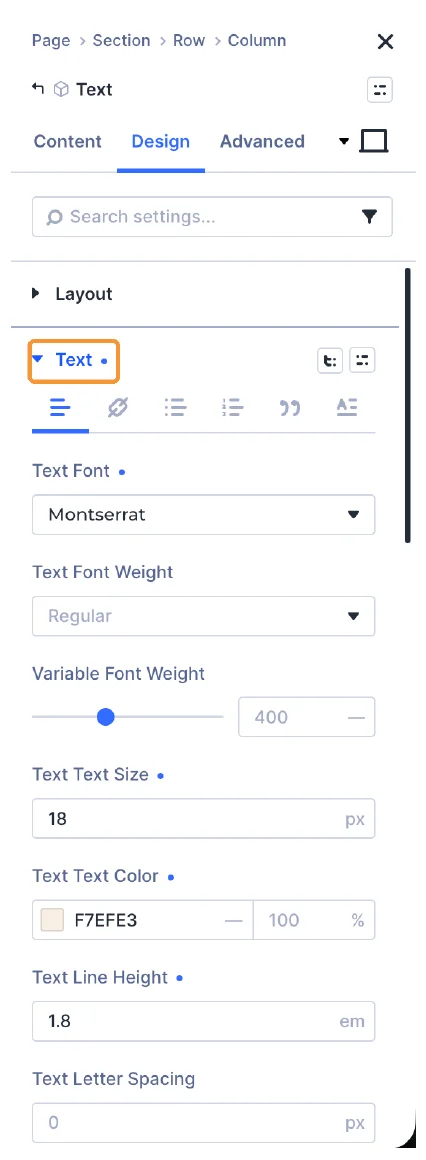
Design is where you change the details: font, weight, size and color.
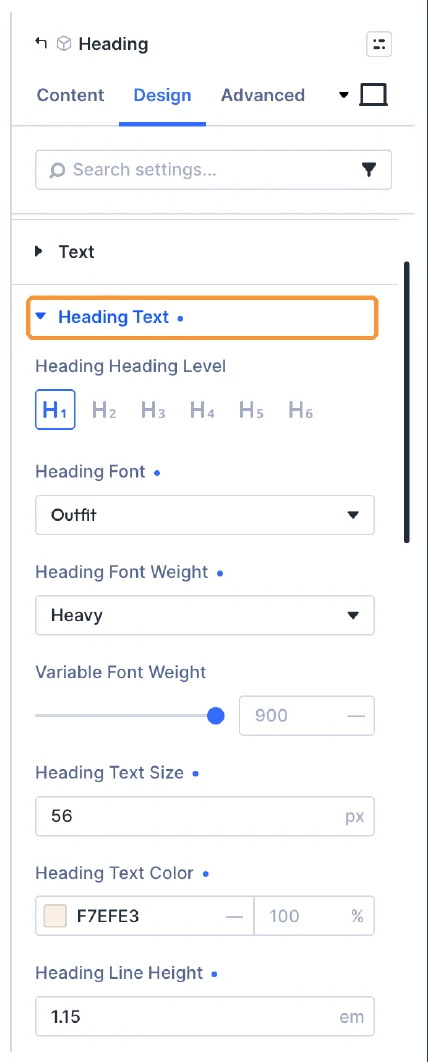
Heading module Design tab with Heading Text highlighted

For headings, open Heading Text.

Text module Design tab with Text highlighted

For text modules, open Text.

STICK TO THOSE TWO

There are a lot of other options in the Design tab. They get more in depth, and changing them can break the page structure that's been built. If you want something beyond font, size and color, reach out first.
07
✦ STEP 07

Swap an image

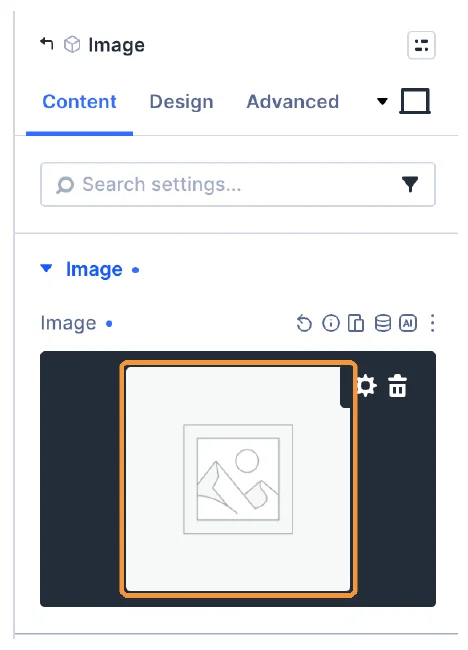
Image module Content tab with the current image highlighted
1

Open the image module's settings and stay on the Content tab.

2

Click the current image. Your media library opens.

3

To add a new photo, click Upload files and choose it from your computer.

4

With the photo selected, fill in Alt Text on the right with a short description, like "New panel install in Auburn." It helps Google and visitors using screen readers.

5

Click Upload an image in the bottom right to swap it in.
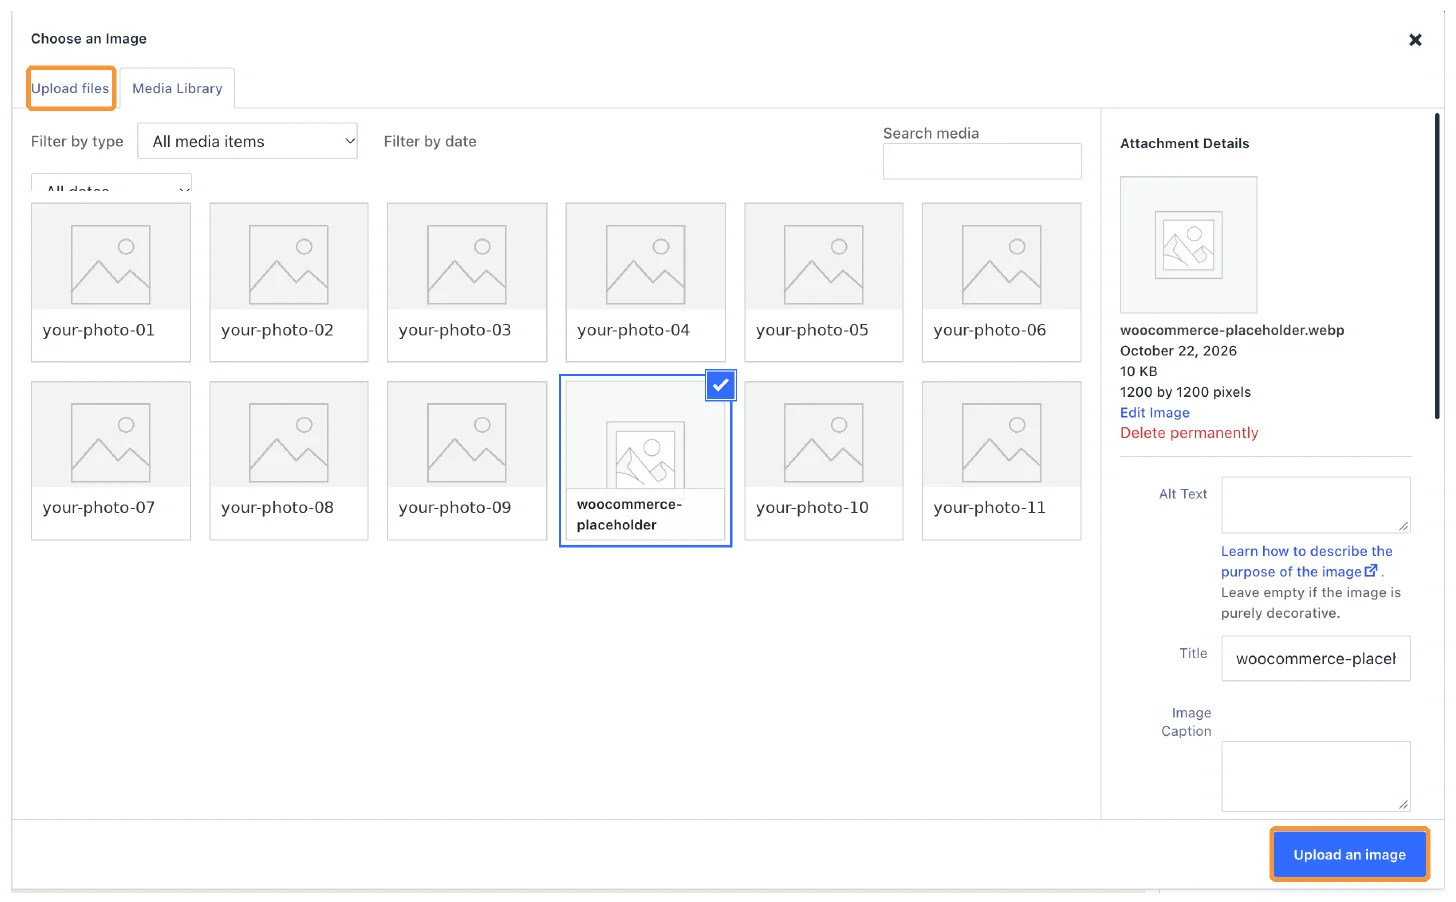
WordPress media library with Upload files and Upload an image highlighted
08
✦ STEP 08

Borders + shadows

optional, use sparingly

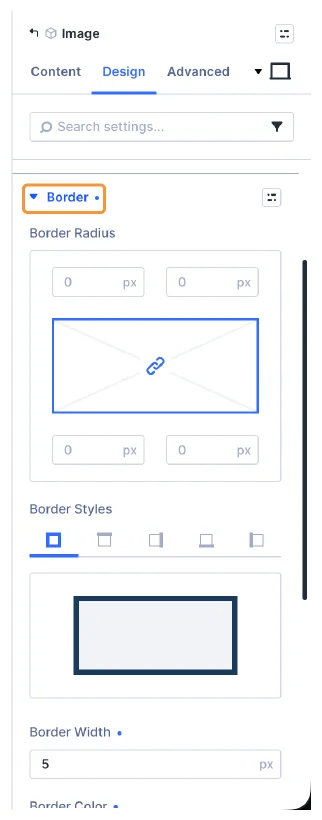
If you want to dress up a photo a little more, the image's Design tab has two easy ones:
✓Border: set a width and color for a clean frame.
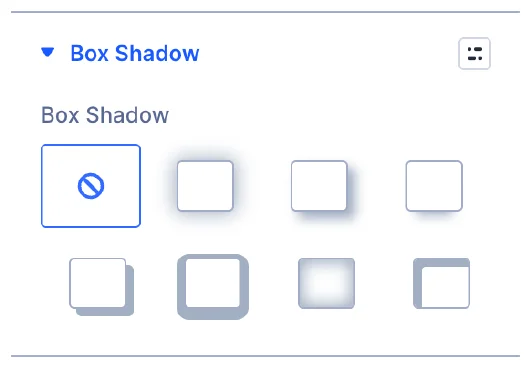
✓Box Shadow: pick one of the preset shadows.
Box Shadow preset options
Image Design tab with Border settings highlighted
09
✦ STEP 09

Save

Always click Save in the top right to publish your changes. That's it, you're done.
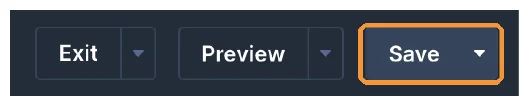
Divi top bar with the Save button highlighted
✓
✦ LAST THING

After you save

CHECK IT ON YOUR PHONE

Open the page on your phone too. A lot of visitors will see it there first, and longer text can wrap differently on a small screen.

NOT SEEING YOUR CHANGE?

Your browser or the site's cache may still be showing the old version. Refresh the page or give it a few minutes. Still old? Send me a text.

QUICK REFERENCE
the whole thing
01Log in at /wp-admin
02Pages › Edit With Divi
03Only edit the grey modules
04Hover, click the gear
05Content tab for wording
06Design tab: Text or Heading Text
07Click the image to swap it
08Borders + shadows, sparingly
09Save, top right
↺Ctrl/Cmd + Z to undo

NEED MORE THAN THIS?

happy to help

Small text and image swaps are included in many retainer plans. For anything else, I'm happy to quote the change or walk you through it so you can handle it yourself next time.

BOOK A CALL